Garden Rock Ideas - With Pictures!

An awesome way to add some diversity to your garden is by involving rocks. Here is a quick post with 6 great rock garden ideas. Enjoy

lushome.com

roomzaar.com

homesideas.com

gardenlandscapeideas.com

wallhome.net
landscape.440.fc2.com

Snake Plant - A Great Indoor Plant

the-sweet-life-ja.tumblr.com
The Snake Plant is a great plant to have indoors or in a sheltered spot outdoors. It is also known as 'mother in-laws tongue'. With a thick grass like look, they add a bit of diversity to nearly any home. They have an amazing yellow border and a thick green stem. The average height for these plants is 60-100cm high and the growth rate is medium.

These plants are extremely hardy and drought tolerant which makes them a perfect plant for beginner gardeners or even small children. They only need watering once the soil is dry.

When picking a plant, look for one with no brown spots. If healthy from the beginning, they tend to stay healthy unless care is not taken. 

A great part of these plants is the propagation ability. They grow new groups of plant which can be snapped off and planted. This means it is possible to turn one plant into several!

Overall, the Snake Plant will make a great addition to your house as an indoor ornament or an outdoor plant.

9 Tips For a Perfect Lawn

It is a proven fact that improving the look and quality of your lawn can raise the value of your property. Here's 9 tips on creating and maintaining the perfect lawn.

1. Choose the right seed for your area. Some grass types will thrive and others will not so it is important to have the grass type sorted before seeding.
2. Prepare the soil for the seed. Raking the soil 10-20cm deep is essential in providing the best conditions for the seed. Once raked, smooth and pack in the soil. This is best done with a roller.
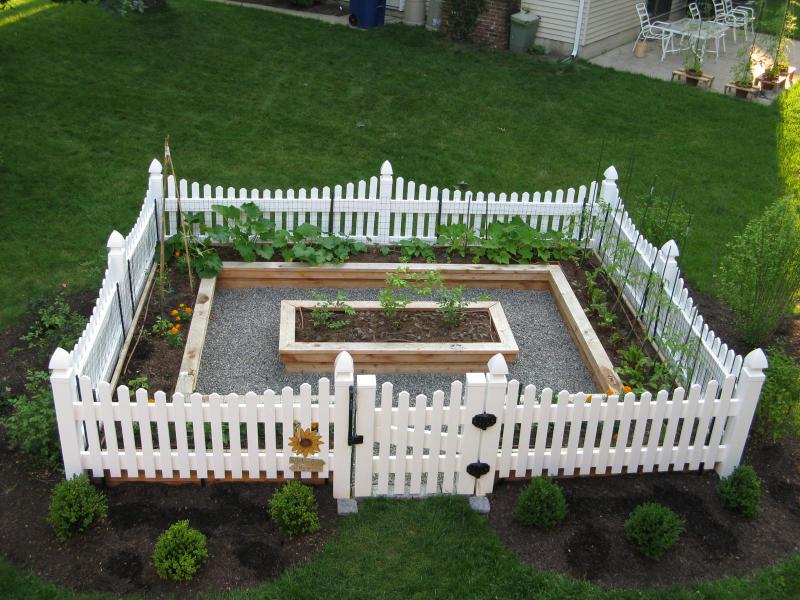
3. Lawn edging makes a lawn look 100% better. A fine, easily determined edge will ensure the grass will look tidy and be easy to maintain.
4. Cut the grass regularly to ensure thick and healthy growth. A regular cut encourages the grass to bunch up and fight off weeds.
wrightgardenservice.com
5. Sow the seed in autumn. This is the best time for grass to be sown as it is still warm but offers natural watering too.
6. Providing adequate drainage is important in the reduction of weed growth and a healthy, non-patchy lawn.
7. Use a weedkiller that wont kill the grass to get rid of the prickles in the lawn. The best time to do this is spring.
8. Aerate the lawn using an aerator machine or garden tools by punching holes in the soil. This will improve the composition of the soil.
9. Fertilize your lawn in autumn and spring for best growth. If the lawn in new, you will need to be careful with what product you pick as some fertilizers can burn young grass.

How to Plant a Hedge

Hedges are a great opportunity to improve aesthetics, propagate or even provide privacy. With good preparation and planting, your hedge can thrive and look the part! They make a great little garden wall without having a fence or barrier.

lymefield.com
Two of my favorite hedges are Camellia and Buxus hedges. They look great, grow well and are easy to maintain.

When planting, there are a few important things to consider; equal (or close to) sized plants and soil quality. Having similar sized plants will ensure they grow at a similar rate. Soil quality is very important. When growing hedges, you will get good healthy growth in a good quality soil.

Line the area of planned hedging and dig up about 1-2 feet deep and wide. It is also a good idea to mix in compost as this will supply the plants with vital nutrients. Small hedges like Buxus should be planted 20-30cm apart. Larger hedges should be planted between 50-100cm apart. When buying the hedge, ask the salesperson for distance between your species of hedging.

Look at my post on How to Plant a Shrub or Tree for more detailed information on the planting process. Best of luck with your hedge!

How to Plant a Shrub or Tree

treesonearth.org
It doesn't seem hard to plant a tree does it? It really isn't but it is also easy to make a mistake and end up with a loss of growth or even death of the tree. Here are a few simple steps to follow when planting your next tree or shrub in the garden.

1. You want to start by thoroughly watering. This will help with maintaining moisture in the root ball and breaking it up enough to not damage the roots but spread them.
2. Once this is done, dig a hole much bigger than the root base of the plant. A good rule is to have it about 1.5-2 times as wide and deep as the root base.
3. Optional: Mix into the soil some compost. This will help with supplying nutrients to the plant in its new home.
4. Place the plant in the hole. The top of the root base should be at ground level. Move the dirt (and compost if step 3 was done) into the gaps around the plant and apply pressure to pack the dirt in. Do not over pressure it.
5. Thoroughly water all the soil within 2-4 feet around the plant. This will ensure the root base and surrounding soil has enough moisture to maintain and will contribute to settling the plant into the hole.

It also helps to remove any damaged or dead roots from the root base. However, you should avoid damaging the roots and plant as every little bit helps.

Considering Your First Greenhouse? Read here!

Keeping plants at optimal health can be made a lot easier with a decent greenhouse. While you can spend a lot of money on a greenhouse, it is also possible to start small (like I did with a old fish tank) and then move up as you can afford/need it. Remember plants can be brought up outside in a sheltered area so there is no rush for a greenhouse! However, they do make everything much easier.

There is a great variety of greenhouses ranging from self made to pre-made models.
When interested in buying a greenhouse, it is always best to ask your local store on advice, Google greenhouse builders in your region and consider the size needed. 

offgridworld.com


A self made greenhouse like this one is easy and cheap to make when only wanting a small area for plants.


eco-friendlyhouses.blogspot.com


Pre-planned/made greenhouses such as this one are obviously going to have more benefits to the plants but in the long run, you can only afford whatever you can afford.


infobarrel.com


They come in different shapes or sizes so remember to do your research!


giesendesign.com

Metal framed glasshouses are also a great, sturdy option.


How to Water a Potted Plant From the Bottom Up

deepgreenpermaculture.com

Pots without Saucers: This can take a little more time but tends to work just as well. If the pot is too big then put in in a large plastic box/tray. Fill it with water and give it time to let the water soak up through the soil. Remove the pot from the water once damp on the top. If the pot is small, a sink works well. Place the pot in the sink and fill with water until the water is about 1 inch below the soil level. It will quickly soak up through the soil and show dampness on the top. Remove from sink when damp. 


Note: You do not want the pot sitting in water for long periods of time as the soil does need to drain. 

Watering plants from the bottom is crucial in maintaining good oxygen levels and good soil composition in the pot. It may seem harder and annoying but it really does pay off and always feels like the growth rate is improving for some reason. 

Pots in Saucers: If your pot is in a saucer, it will be easier. A good way to water from the bottom is to fill the saucer as high as you can with water before it overflows. This allows the water to slowly absorb up throughout the soil. If the top of the soil doesn't look damp once all the water is gone, fill the saucer again. Repeat this until the soil looks damp on the top.


How to Grow Snow Peas - Easy and Delicious

agoodhuman.wordpress.com


Snow Peas are super easy and fun to grow. They make a great little plant project for children or even just as your first plant grown from seed. I have had great success with Snow Peas and it has been very rewarding.

All you need is:
1. Seed Raising Mix (normal topsoil works too)
2. Snow Pea seeds
3. Seed tray or pots
4. Water (of course!)
Here is 5 easy steps on how to do it:

1. Fill the pots or seed tray with seed raising mix. When filling a seed tray it is alright to fill it to just below the rim. If using pots or seed pots, fill to about 1 inch below the rim. Pack the soil in firmly with your hands/fingers to stop it from sinking when wet.
2. Water the soil from the bottom. This allows the soil to get fully and naturally wet rather than partially wetting it.
3. Use a small stick (about the size of the Snow Pea seed) to poke holes in the soil. The holes only need to be about 2-4cm deep. This is where the seeds are going to go.
4. Drop a seed into each hole. You can also drop two seeds into each hole as some seeds may not germinate. This will not damage the plant as the faster growing plant will overrun the other one.
5. Lastly cover the holes and firmly push over the seed.

Best of luck!

3 Ideas on How to Save Money in Your Garden


We all like to design and put in place our own plans so I thought I'd throw together a few ideas I have come up with or found on the internet.

Worm farm by using plastic boxes:
A great and cheap way to build a worm farm is to use plastic storage cubes. The good thing about these is that you can start with two. One catch tray and one first waste tray.
All that needs to be done is holes drilled in the top of the waste tray and a cover put on. The cover can just be a rubbish bag (this is mostly to stop the worms from getting over exposure).

As each rubbish tray gets more full, add another with holes drilled.


full-monte.me
Tyre Planter Boxes:
The next and very easy way to save money when planting plants is to use tyres. They are usually free to take at a lot of car yards.

If you fill them with soil, they make great planter boxes and can be arranged into nearly any shape you want. A lot of people even stack them!


repeatcrafterme.com


Pallet Gardening:
Pallet gardening is another great way to save money. Instead of seed trays, planter boxes and expensive wood, you can get free pallets from your local hardware store and use them to protect and grow your plants. It doesn't just have to be veges either.


All 3 of these ideas are easy and close to free to do. While it isn't always easy to get your hands on tyres or pallets, in the long run it is definitely worth it. Good luck!

Some Garden Motivation for Your Week

We all need some garden motivation so here's a bit of a kick for your week. Enjoy some of these stunning gardens and setups.

sdpremierehomes.com

newsinteriordesign.com

noordinaryhome.com

telegraph.co.uk

scoop.it

funny-pictures.picphotos.net


galleryhip.com

Home Improvement - Retaining Wall Model Ideas

Retaining walls offer a good reliable solution to holding something up and looking good too. Yes, they can be quite expensive but in the long run, a decent retaining wall will add value to your house as well and improving the structure of the surrounding earth. This article includes several current retaining walls - a bunch of my favorites!


houseideas.org
croftonstone.com

thisoldhouse.com

homeanddecor.org

labdal.com

blog.triadassociatesinc.com

kitairu.net

designretain.net

Some of these retaining walls are cheaper than others but remember that cost isn't everything. Look at the planned result, maintenance required and size all compared to the cost. The more expensive option may sometimes be the better. DO NOT get it done by somebody who doesn't know what they're doing. If retaining walls go wrong, it can be very very expensive.


A Few Quick Tips on Hedge Cutting

nakoo.net

It can be quite easy if you use a guideline. This is basically a line you attach to two ends of the hedge and follow along with your cutters. This will allow a straight cut.

We all know that feeling of dreading to do something. A lot of us dread cutting the hedge because it is so hard to cut straight and still look nice.


Another good tip is to cut 6 branches and then step back and look from a distance. Why 6? I'm not sure, but it just seems like a good number. If you cut it in small amounts, step back, check from a distance then you will be able to see what needs to be cut. This also allows you to shape the hedge into different (non-straight) shapes.

Had to throw this one in from tradesman4u.wordpress.com. Its great!
A key tip to start with is to check just under the branches to identify where there are and aren't leafy branches. If there are small amounts of leaves or woody structures under the branches then avoid cutting down to the woody stuff yet. It will grow leaves if cut but best to cut this part when nobody is due to come over. It has to look nice for visitors!

How to Germinate Seedlings


By being a gardener, it is thrilling to have grown your own plant from seeds. The growth stages are great to watch and it is definitely worth it.

You want to pick seeds from a reputable source. If they seem to good to be true, they probably are. Go for some seeds that will be fine in your area. If in doubt, Google it.

How to germinate them:

1. Find out when the best time of year is to grow seedlings. In some cases, you can grow them at any time of year indoors.
theguardian.com
2. Purchase a seed raising mix. This is the safest and easiest way for your seeds to grow as this mix is designed to hold enough water to stay damp but not soggy.
3. Choose a seed container 2-3 inches deep. If using trays with individual segments, fill them to about 1-2cm from the top.
4. It is important to wet the soil before you plant the seeds so it can compress down from the water and not over cover the seeds. Dip the bottom of the pot, tray or seed tray in water and let it raise to the top. It will look damp when fully watered.
5. If the seeds do not need to be soaked for a few hours prior to planting, plant them about 3 times the thickness of the seed. This is a good rule to know when planting.
greeningofgavin.com
6. Keep the seeds moist up to and while they germinate. Avoid letting them dry out. Keep them in a suitable environment for the seed type.

How to Start a Worm Farm

hivetaranaki.co.nz


About 40% of a households waste is organic matter that can be fed to worms. 40% is a big number! You could be recycling this waste and using it to allow your garden to thrive. Worms start from the bottom layer in a worm farm and move up as they eat all the organic matter. They leave behind vermicast (poo!) and their urine. Both of which are great for your garden.

How to start your worm farm:

1. Piece together a worm farm kit with one tray above the collection tray. This is the tray you will put your waste in.
2. Put newspaper, light soil, coir or paper shreddings down first then cover with some organic matter. This is where your worms will live.
3. Over time or each day, put your food scraps and some garden scraps into the worm farm. As each layer gets more full, you add another one and the worms will move up.
4. Once the bottom layer has no (or very little) worms in it, remove it and use it in your garden as compost, fertilizer or mulch.


Worms can eat anything from hair clippings, manure, food scraps to even grass clippings. Make sure you keep a bit of air in the worm farm by occasionally adding shredded paper or cardboard.

Good luck with your worm farm endeavor!

Raised Vegetable Garden Ideas - With Pictures!

In this short post I will include 6 raised vegetable garden ideas. These don't just have to be used for veges as a lot of them do not even have veges in them. Little words, big pictures!

gardenideaspicture.us

gardendesigncy.com


yardshare.com
thisoldhouse.com


http://img.more-explore.com/medium/54/raised%20garden%20beds.jpg
img.more-explore.com


upillarhome.com


Five Garden Fence Ideas

Another good way to improve the aesthetics of your garden or yard is to replace the fence. This gives your whole garden a brand new look without much work and it will be the same for years and years to come. Here are a few ideas from pictures:

1. This fence is able to separate your veges from the rest of the yard while still looking tidy! It would go great with a simple wooden garden shed similar to the ones in my Garden Shed Ideas post.
gardenideaspicture.us


2. This is a simple but modern and complex looking fence that will surely add to your beautiful garden.
benlannoy.com


3. This fence provides this yard with an interesting concept being so plain but pleasant.
decoradvisor.net


4. Got the view? Make it worth it!
gardenimagedesign.blogspot.com


5. This give the fence that 'pallet' look. Slightly rustic while still being tidy.
wpcdeckingfloor.com


Garden Shed Ideas for Your House

Garden sheds can be a great help if placed in the right place and if you've got a good quality one. They are also fantastic at tidying up your house, garden and garage by keeping all the tools in one place.

In this post I have got a number of shed ideas that may (or may not) suit your garden and give you a great place to hide all those tools.


Pinelap.co.uk
1. A simple and relatively cheap little shed but still has enough room for everything.


2. A little less simple but it's alright to dream right?
whitesconservatories.co.uk
pinelap.co.uk

3. Much like the first shed, this is simple and would look great in nearly any garden or backyard.


 4. A very cheap and effective garden shed here.
www.gardenshedsgalore.com.au


12000shedplanideas.blogspot.com


5. If you have a bit of time and money to throw around, here is an awesome log shed that would be worth a go!


5. This would be the cheapest option in this post and only works if you have very little tools (not everyone has a lot!).  This is only $200!
shedgear.com